DIY Valentine Messages in a Bottle
Posted by April on Feb 06, 2019
Can you believe Valentine's Day is already around the corner?! I'm not sure what it is about this day that makes it so perfect for DIY gifts and, of course, stickers!
I've seen this confetti painted project done before but wanted to put our on spin on it. Not to mention it's super easy and you can customize it for whoever you may be gifting it to!
Supplies:
• Oil Paint Markers
• White Bottle
• 1+ Sheets of our Heart & Star Stickers
• Small Note Paper
• 1 Sheet of 1.75" Sticker Faces of your giftee
• 1 Sheet of 0.75" Stickers of yourself (or whoever you want the notes to be signed from)
We got our oil paint markers from Michael's but any craft store or Amazon should have them. The best part is you can pick whichever colors tickle your fancy and I loved the hot colors that came in this pack.
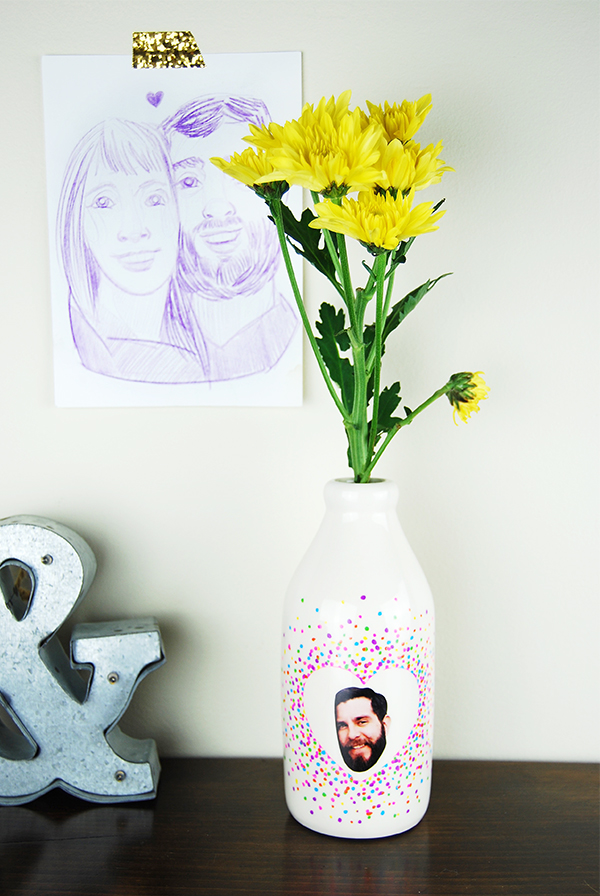
The white ceramic bottle we also picked up from Michael's but you can really use any smooth surfaced bottle!
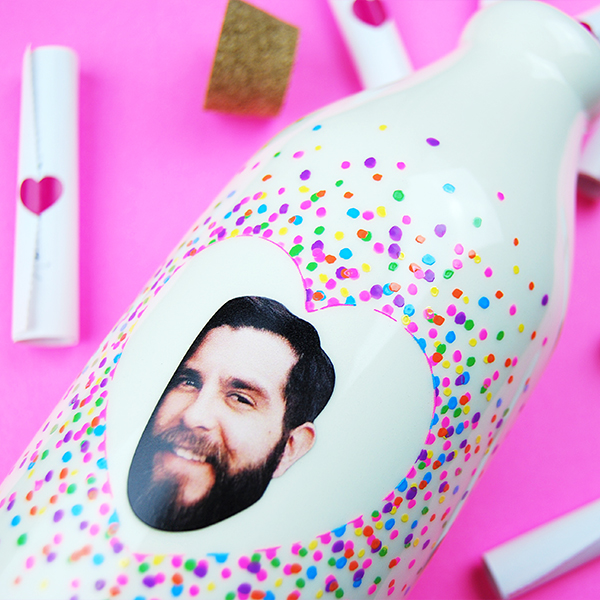
Depending on who you're making the Message Bottle for, you'll need sticker faces of that person. For the outside of the bottle we would recommend a 1.75" sticker and for the notes we recommend our 0.75" stickers.
For the heart stencil that goes on the outside of the bottle we used our biggest heart sticker from our Heart & Star Sticker sheet. These sheets conveniently come with every sticker order! We also used the small hearts on the sheet to seal the wrapped up notes that go in the bottle.
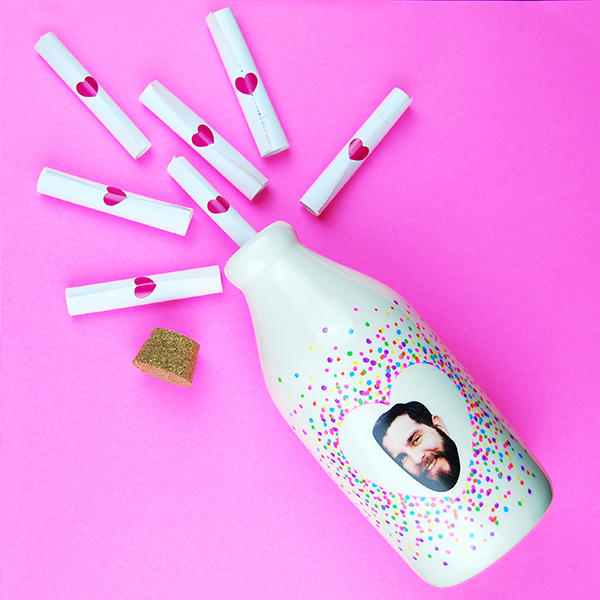
How To Make Valentine Confetti Message Bottle
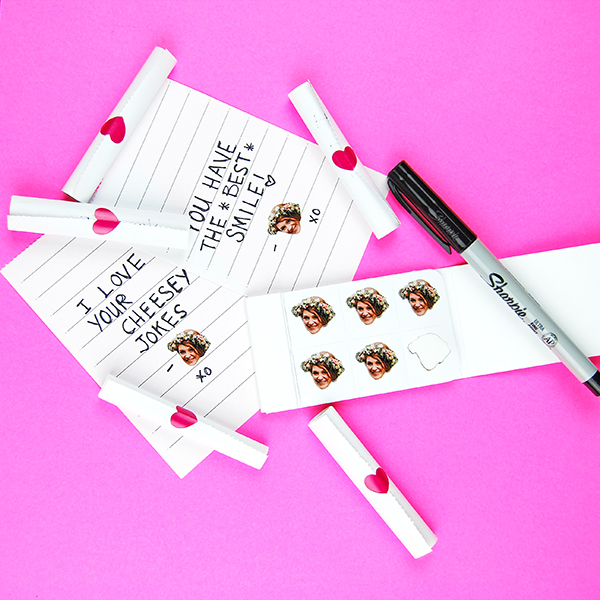
1. I took pieces of note paper (about 3" x 5") and wrote little notes on them. I signed them with a sticker face and then rolled them up and sealed them with a little heart sticker.
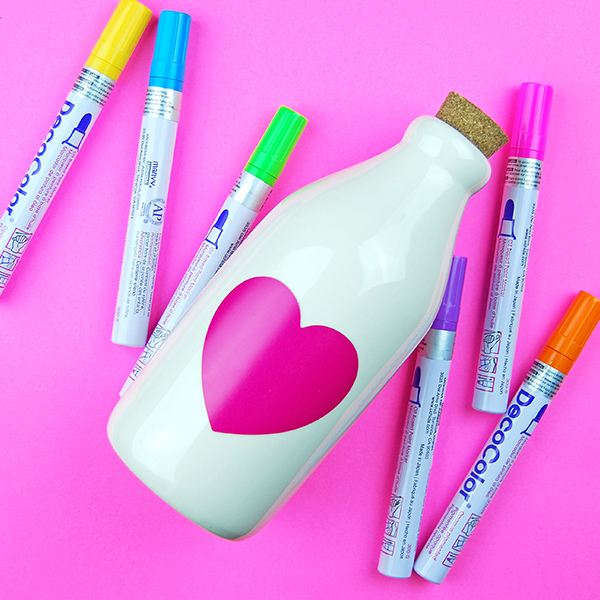
2. When you're done writing all your notes, apply the large heart sticker to the clean outside of the bottle.
3. Next I set up my markers and took my first color and dabbed it around the perimeter of the heart sticker.
4. I then used the same color to dab randomly around the heart, keeping the dots closer together near the heart and then gradually spacing them out.
5. After the color was dry, I continued to do this with the other colors.
6. Once everything was dry I removed the heart sticker and placed a 1.75" sticker face to the center of the heart.
7. Fill the bottle up with all your notes and cap it off!
This project was so fun and simple to do, I kind of want to doodle and sticker up all my belongs now!
If you make this project don't forget to tag us! Use @mystickerface or #mystickerface
Enjoy!