Pet Carrier Charm DIY
Posted by Lindsay on Apr 26, 2020
Hello everyone!
I wanted to show you guys a quick and fun DIY you can do with any MSF Sticker Sheet art supplies you may have around the house. I thought it would be a really cute idea to make a “charm” for Orzo’s travel carrier and give it a little personal touch. This DIY was apart of my previous post, but I wanted to give y’all a better idea of how I made my charm in a few steps.
Take this DIY as more of inspiration than strict guidelines. I know what supplies we have at home can vary from person to person, but I wanted to help get some creative energy flowing during this quarantine moment and try something simple and fun!
*Try to use thicker "crafting" style paper and avoid printer paper - you'll want this charm to hold up to some use! If you just received your stickers in the mail, feel free to repurpose the sturdy kraft envelope your stickers arrived in :)
~
LETS GO!

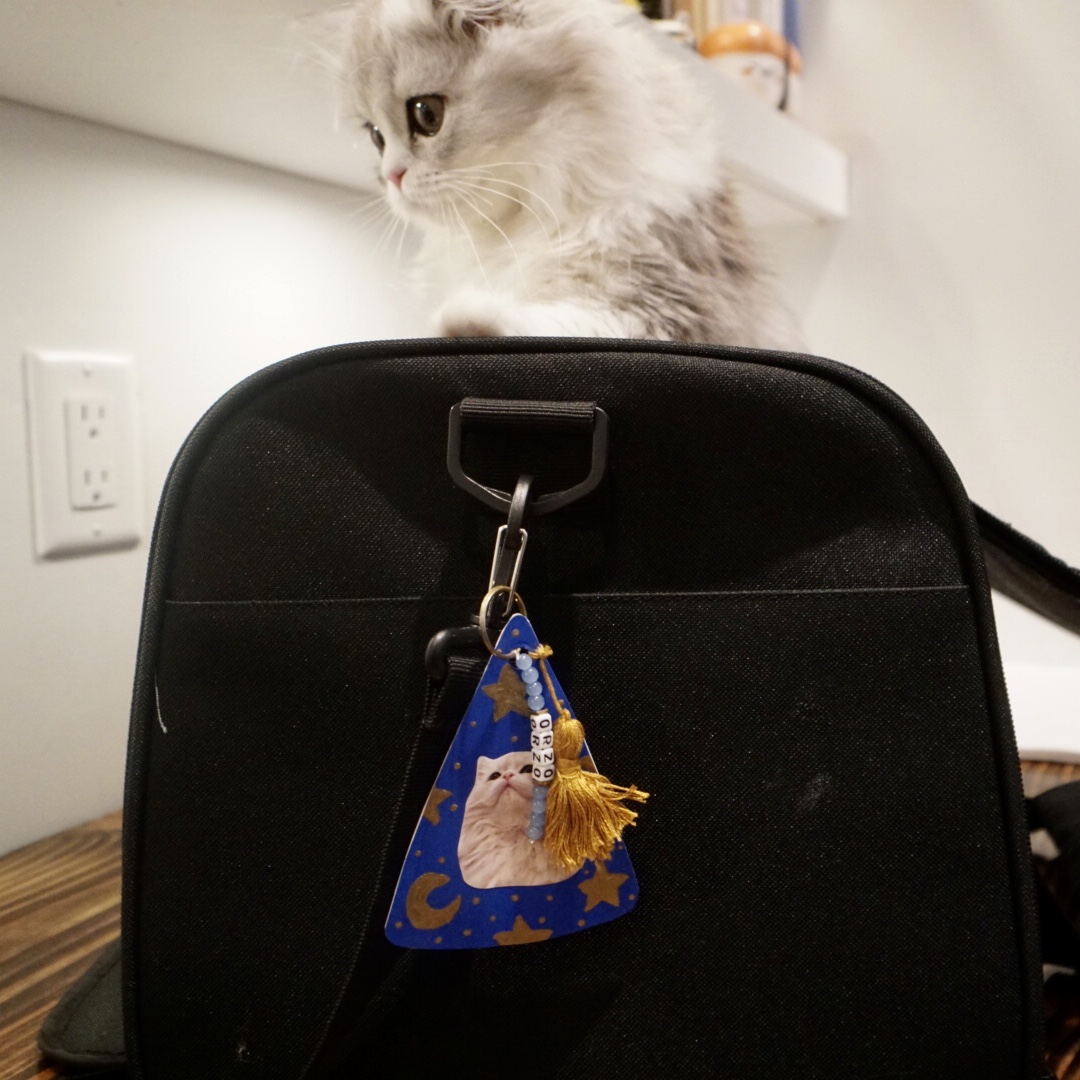
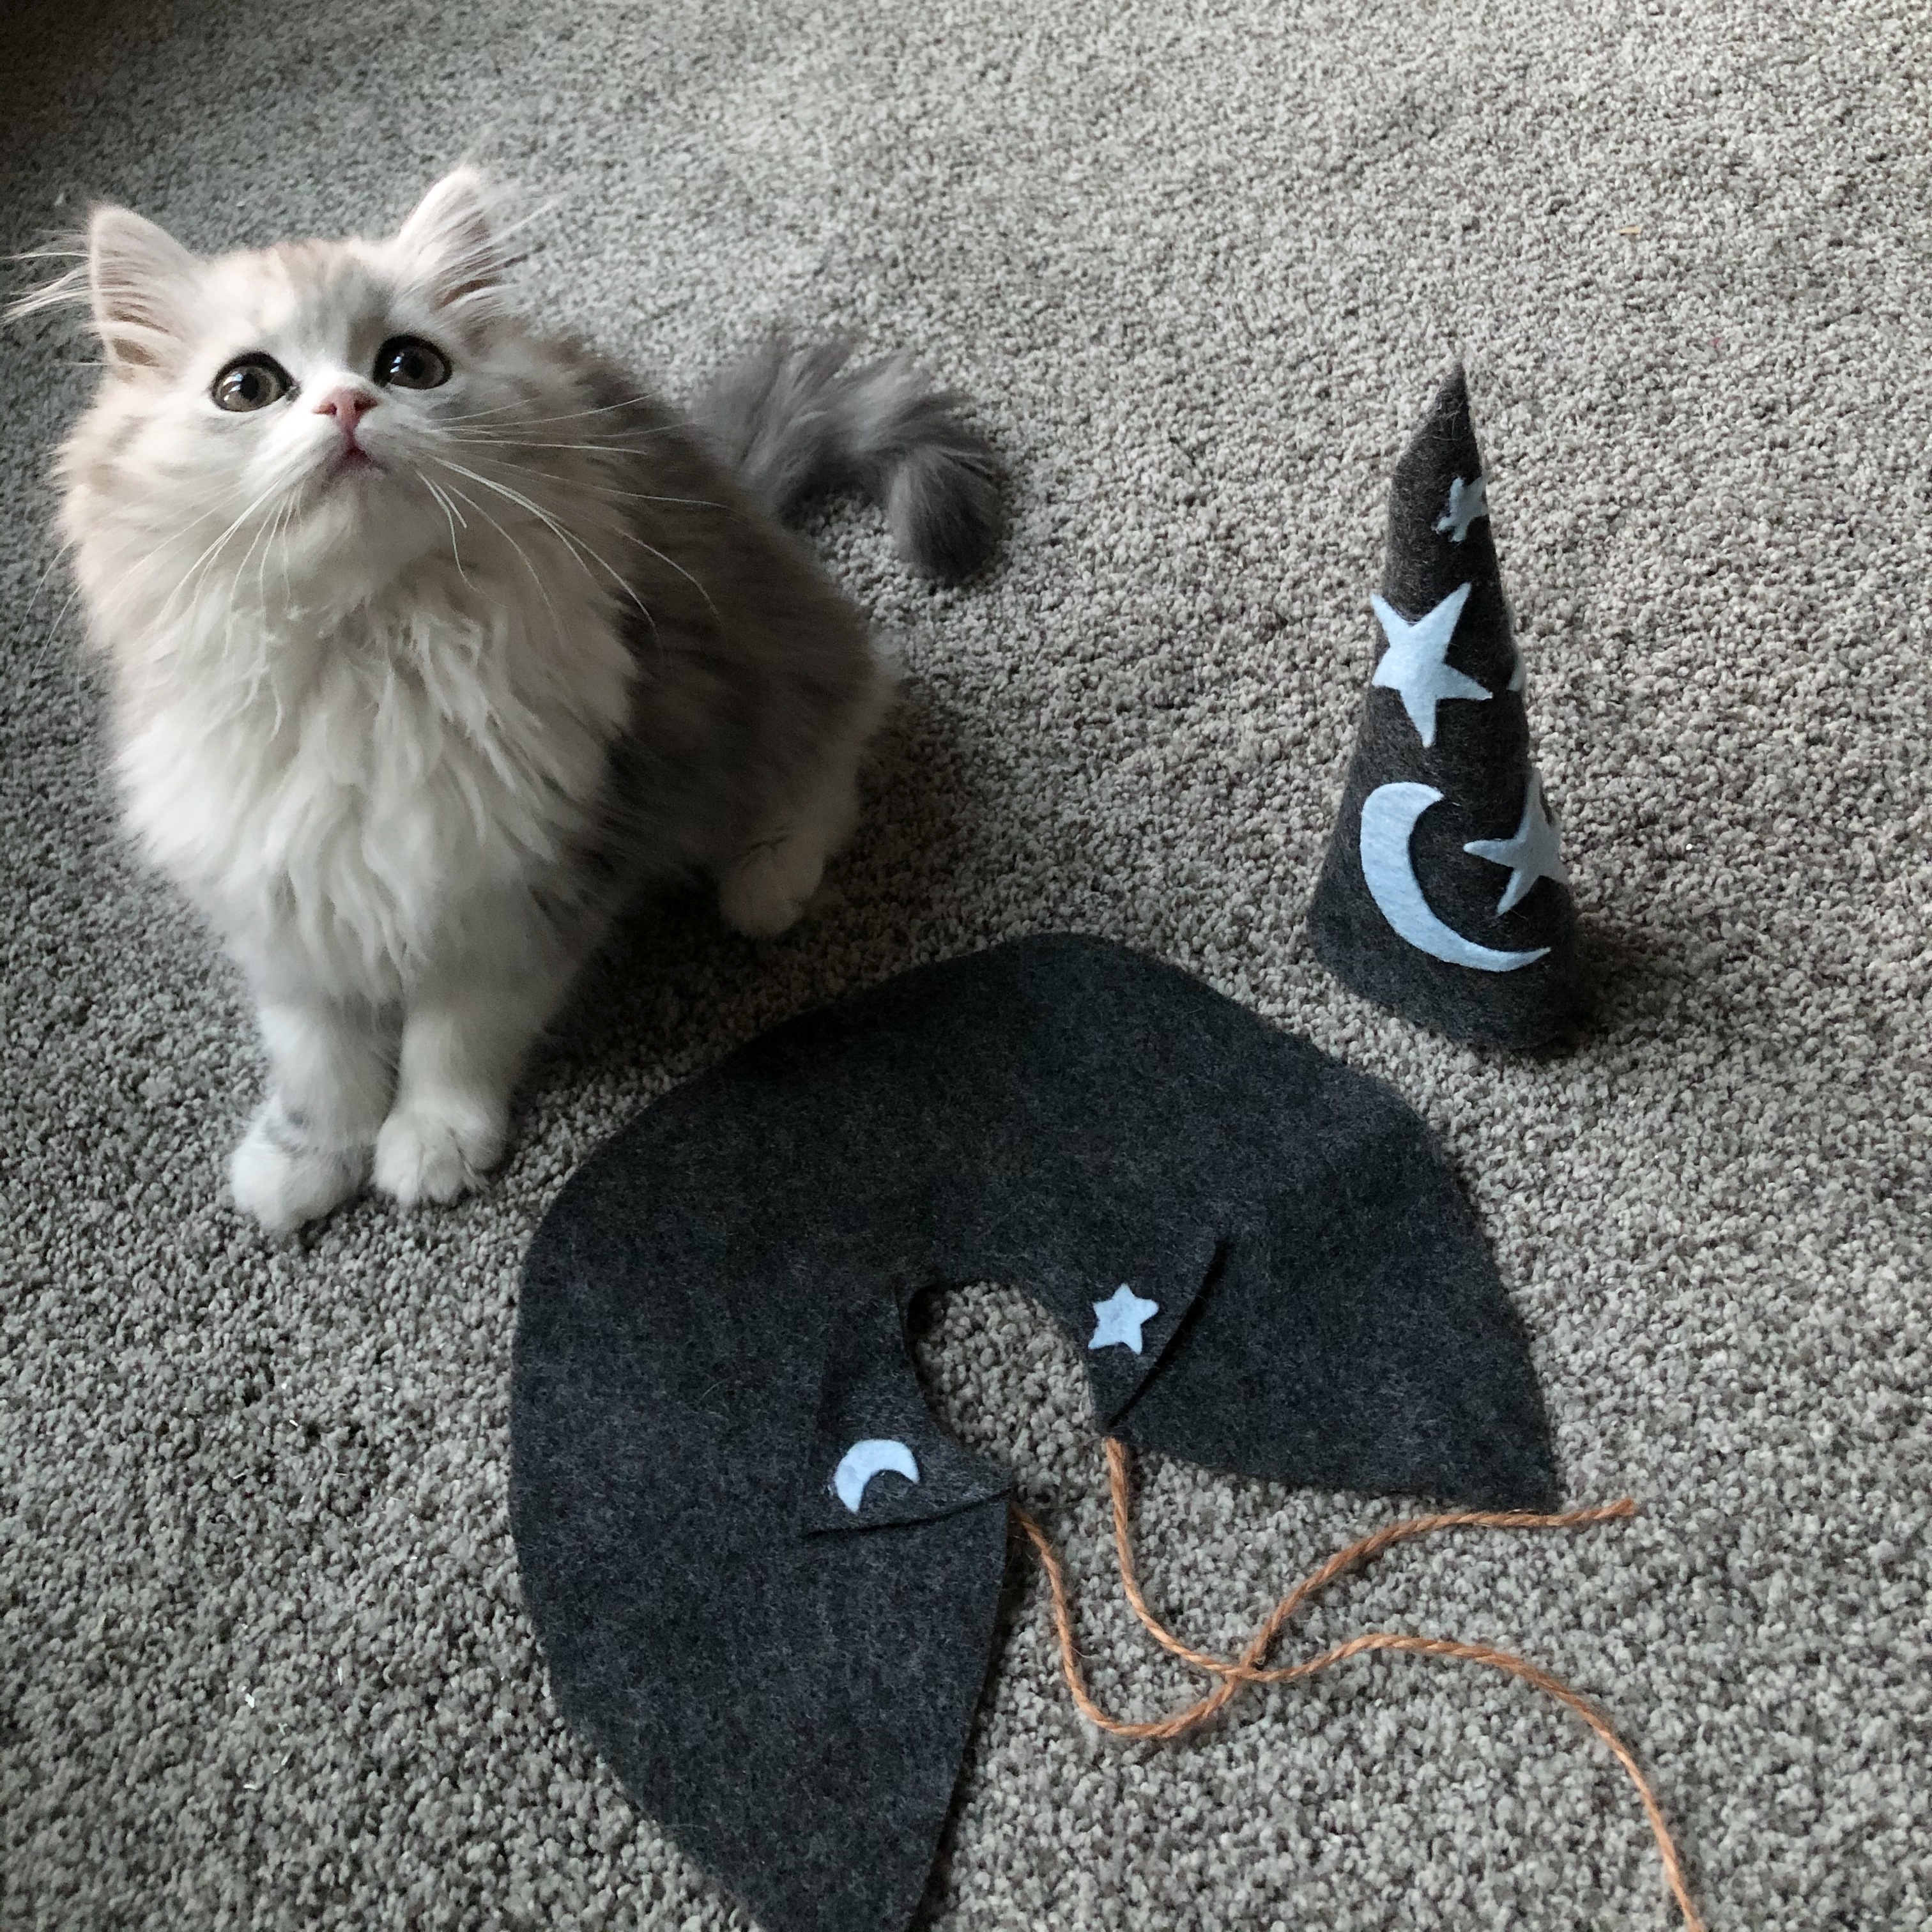
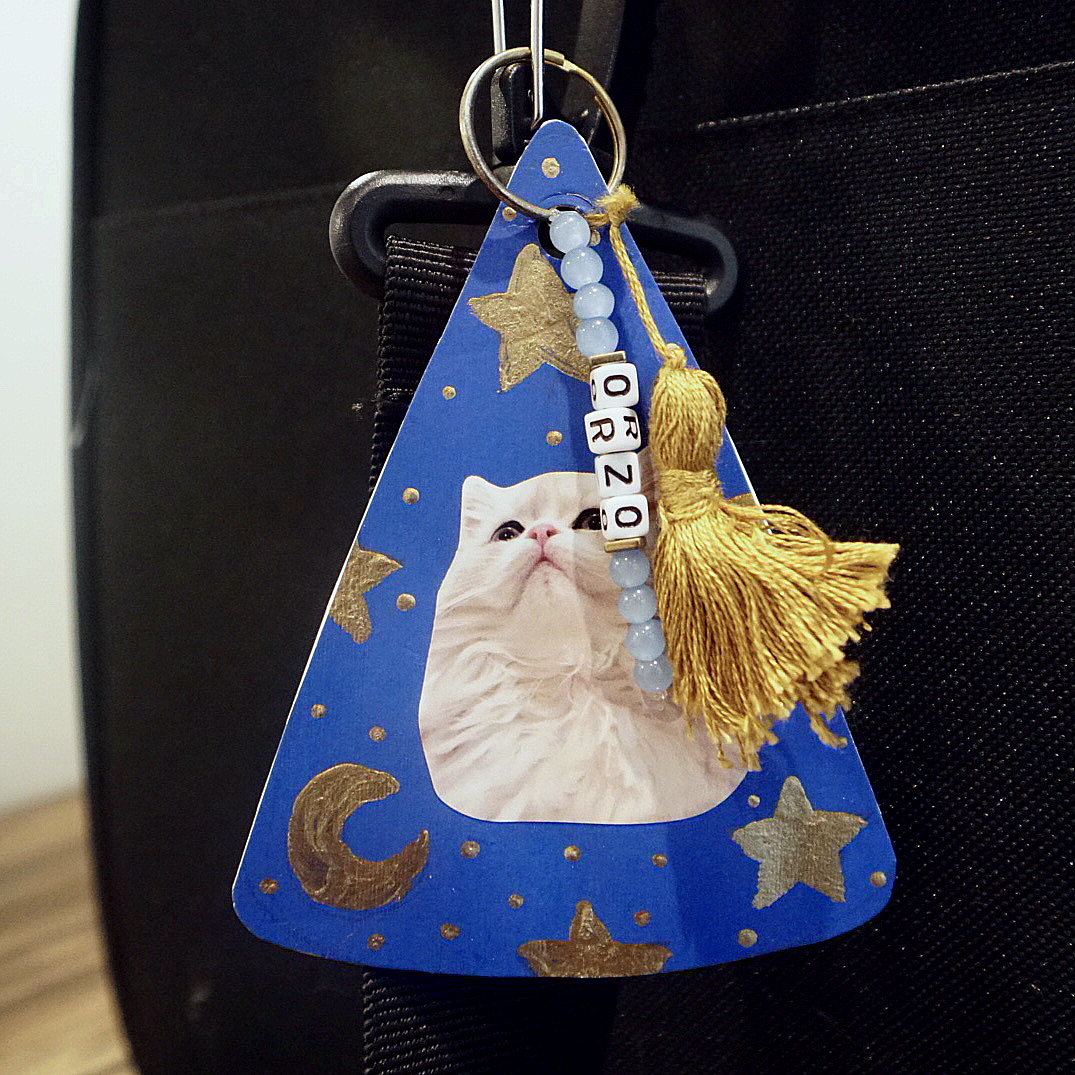
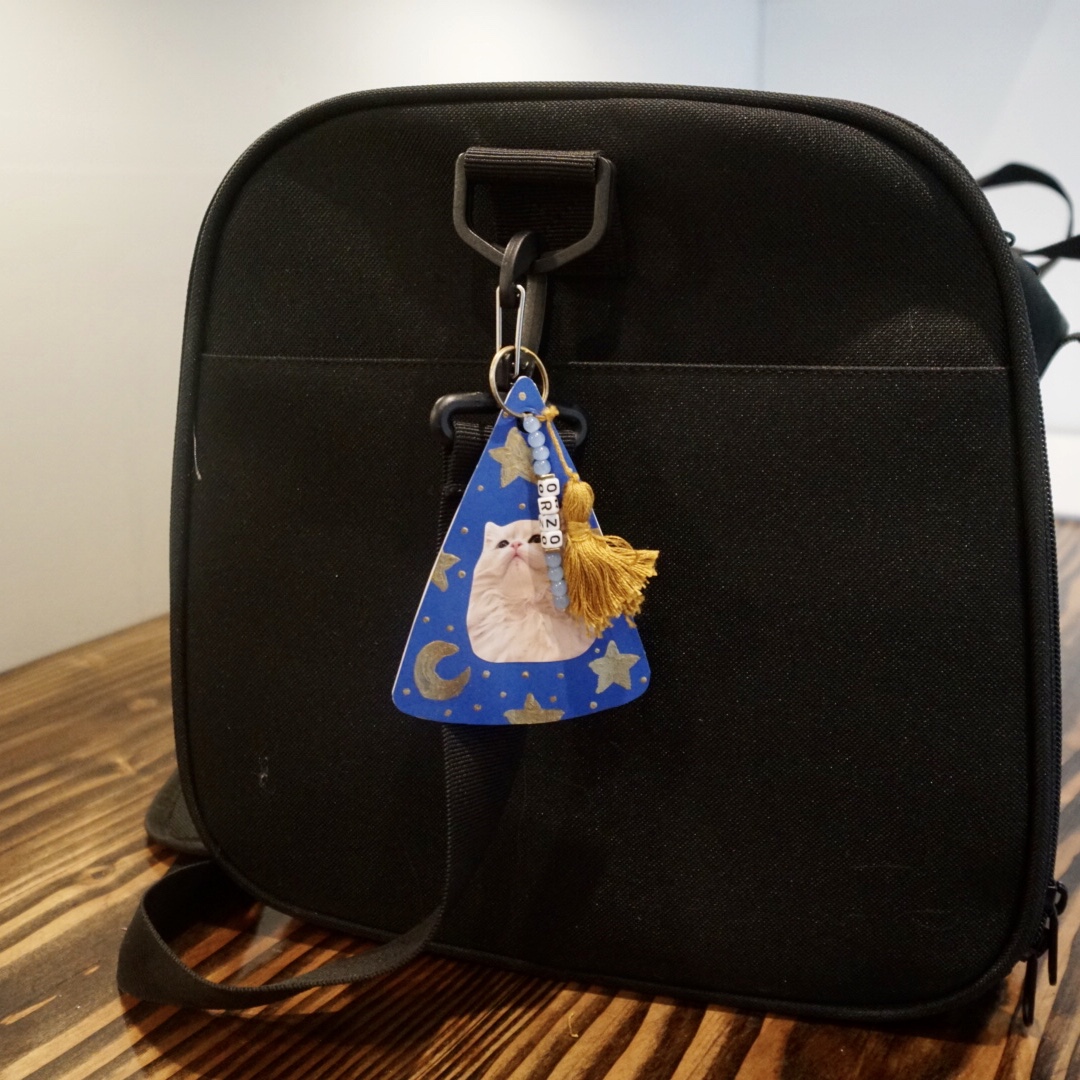
Since Orzo is a wizard cat (among other things), I quickly decided that I wanted my charm to be in the shape of a wizard hat. This is where you can have fun and come up with your own shape - just be sure to reference your sticker face just to be sure the shape you make will fit your sticker! For reference I went with the 1.75” sticker on my charm. Also, biiiiiig shout out to April for hand making Orzo this wizard costume which sparked my inspiration for this DIY :)
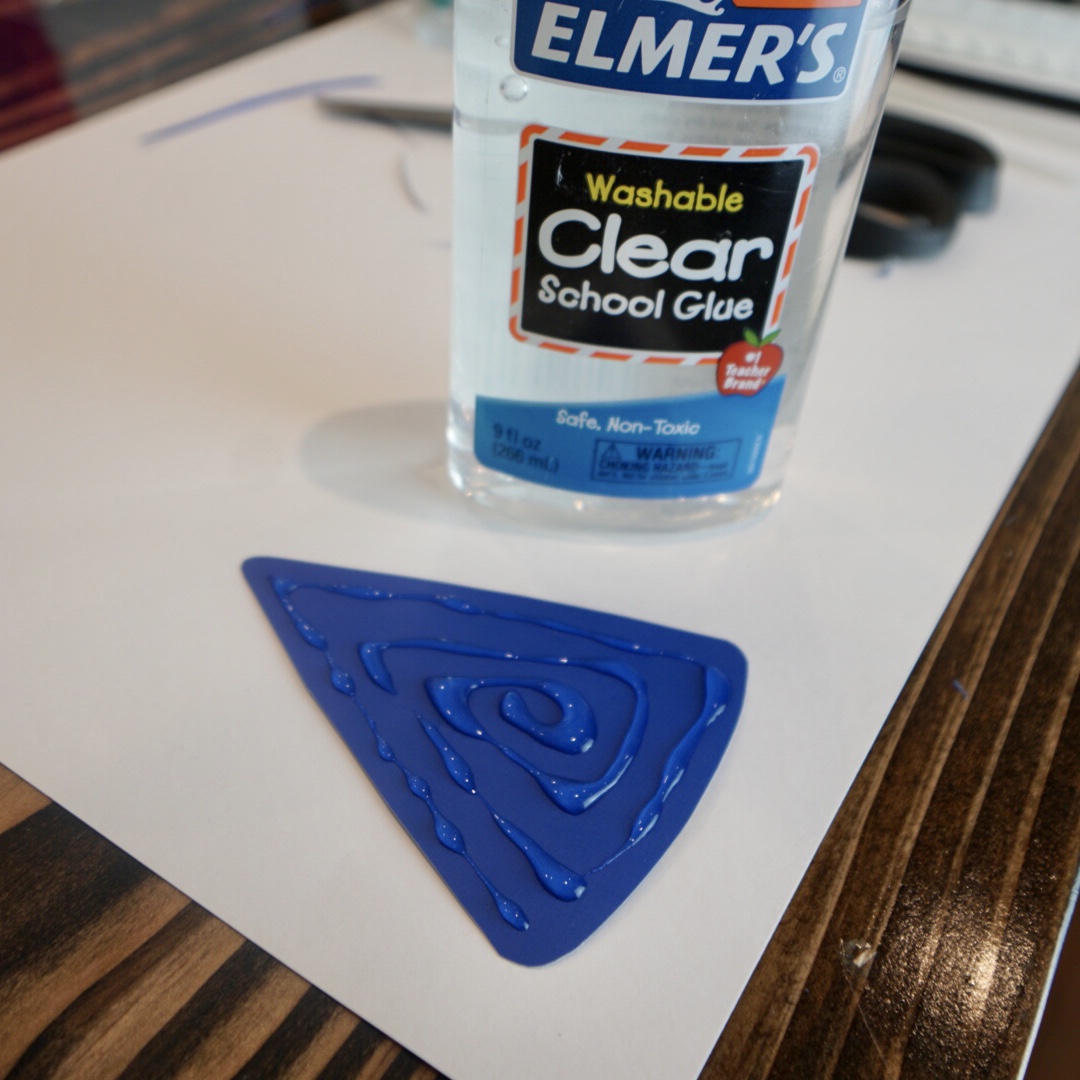
First, I used my pencil to sketch out the shape of the hat on my blue paper, then I placed my sticker face in position. From there, I sketched out where my stars and moon would be and got to painting. I was so happy I found this metallic gold paint laying around in my office because I think it adds a really cool effect to the overall look of the hat. After letting the paint dry for a bit, I cut the hat shape out.


To make this charm a little extra "sturdy", I decided to use my white paper to create a backing and add some additional thickness. I applied glue directly to the back of my cut-out hat shape and just placed it right on my white crafting paper with a heavy book on top of it to help it dry flat. I used Elmers glue, but I strongly recommend a glue stick if your paper is on the thin side as I ended up having some glue seep through the white paper. To fix the glue marks I just added some sticker faces, stars, and colored dots once the glue dried to hide the issue. Happy accidents :)
~
Feel free to do whatever you would like on the backing! You can add some more stickers, paint your pet’s name, write your pets bio...anything!
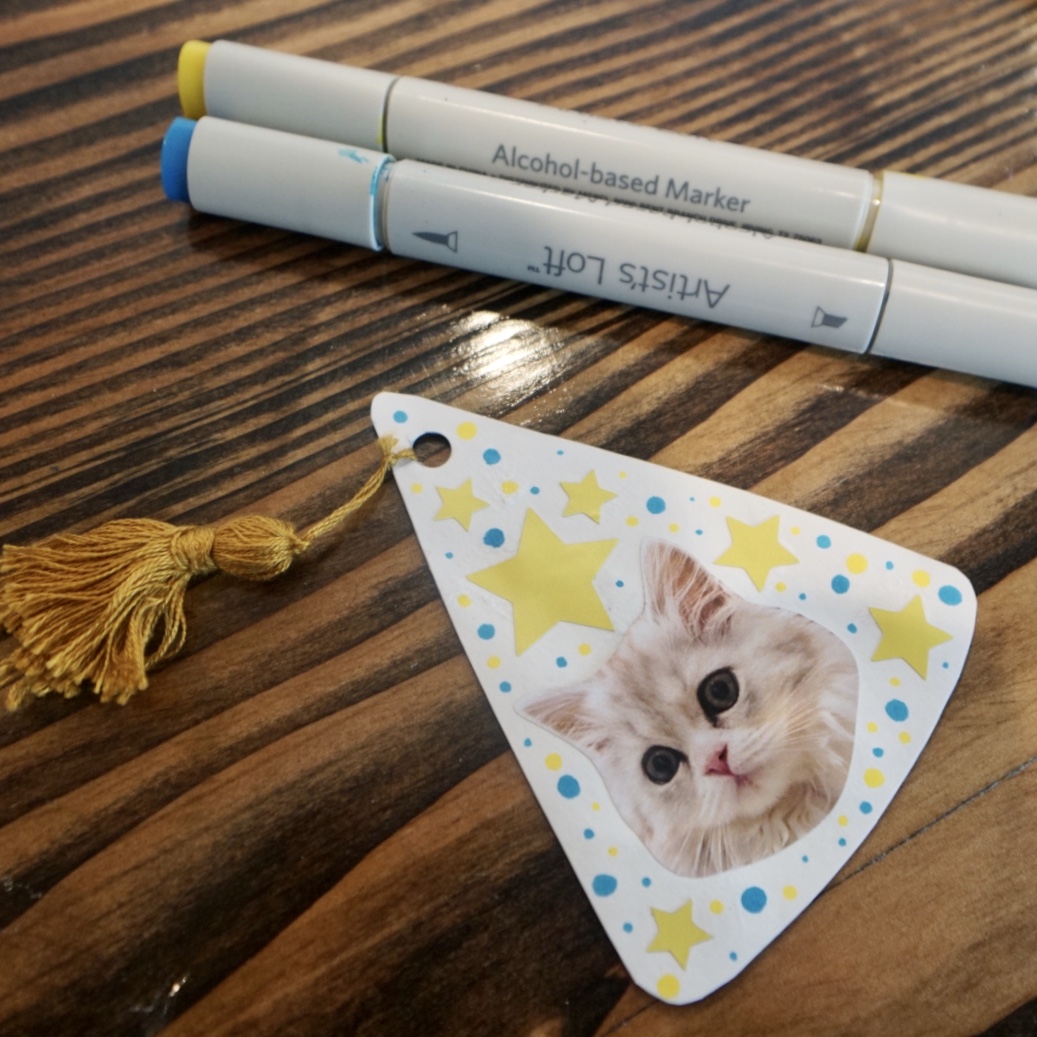
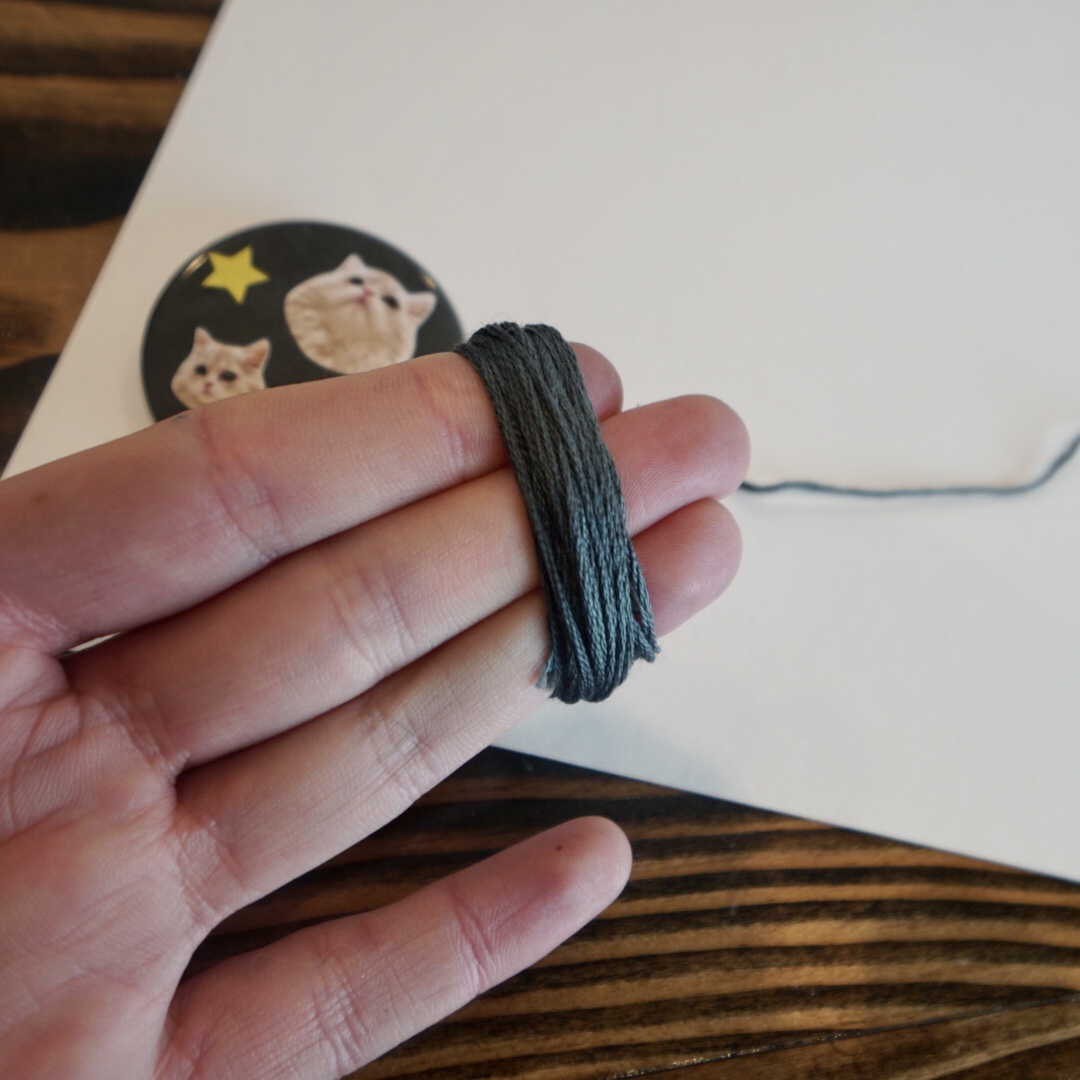
After the glue dried and I finished up the back, I went ahead with my hole punch and made a hole for the key ring at the top of the hat. I then added my tassel (I had already made from a previous project) and tied it through the hole. If you have some embroidery floss, you can check out this video on how you can make a tassel super quickly and easily!
~
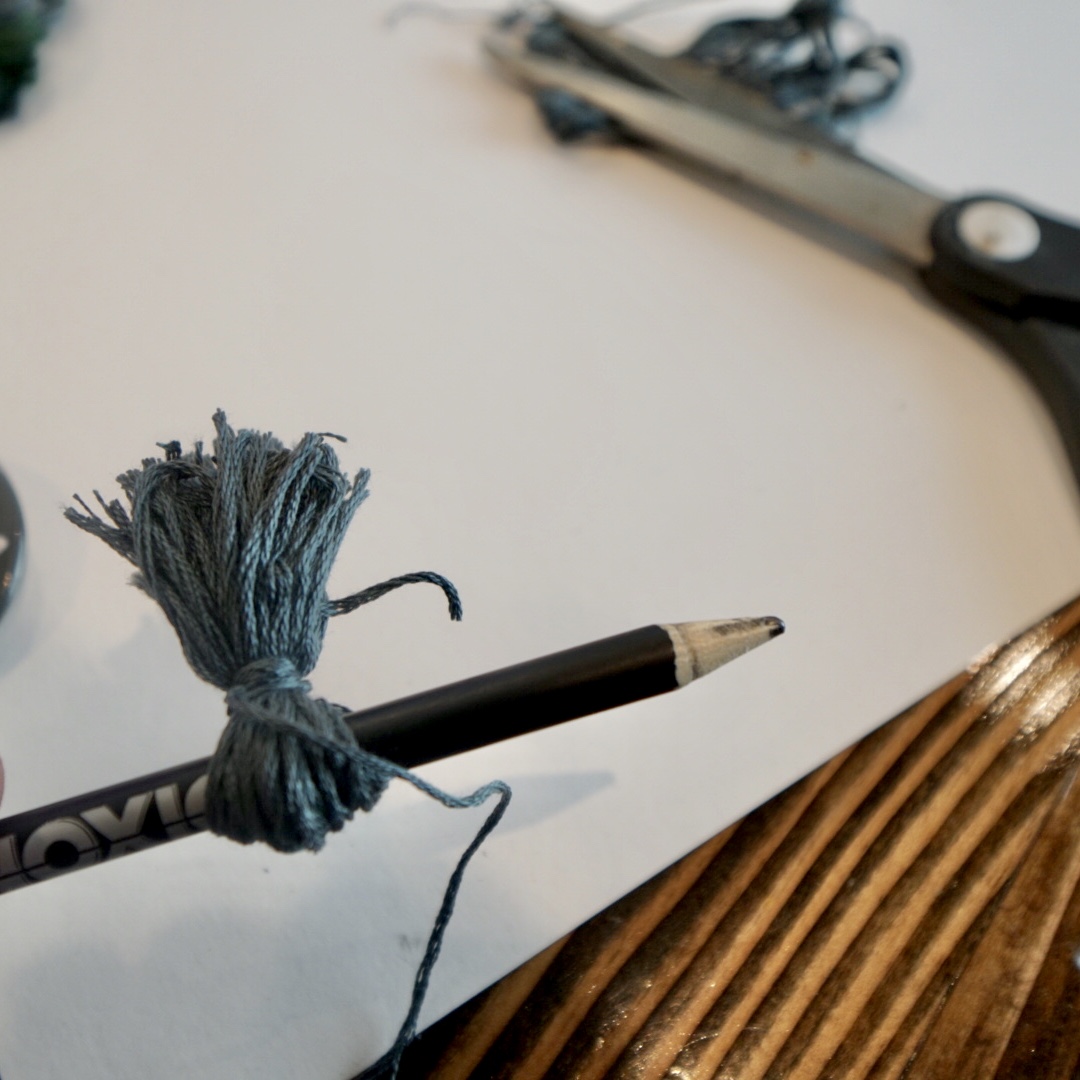
Another way to make a quick and simple tassel is to wrap the thread around your fingers (~20 times) and cut one end of the loop. You can then use a pencil to use as a marker of where you will tie off your thread bundle.

As a little extra addition, I took some elastic bead string and decided to make a little dangling name charm! Put a dab of super glue on the knots at each end (Elmers glue will work fine if you don’t have it!) as this will make your knots stay put. And finally, carefully place your charm on your key ring and hook it on to your travel carrier!
There you have it! Super quick and fun project that you can modify to fit what supplies you have on hand. I hope this served as some good inspo for you to try at home!
As always, don’t forget to tag us #mystickerface to show us what you came up with! Happy Stickering :)